Source Forge–How to upload a project
If you have modified an open source project or created a new project that you want to be available to others for download, Source Forge is a good option. Following are the steps. These steps are assuming you are uploading a Java project. If you are uploading another type of project, just skip the part where it shows how to generate the .jar file.
First, you need to get a .jar file to upload. You can do that via command line or use Eclipse. I will show below how to do it with Eclipse
Right click on project in Package Explorer window and choose Export. Expand Java and select JAR file under export destination. Click Next. It will require you to give it a location where to write out the JAR file. Enter that detail and click Finish.
Your JAR file should be in place.
Now go to Source Forge and create a new account.
Create a new account in Source Forge
Go to Account -> Preferences
Before you can upload anything, you need to generate keys.
After you do that, click Save Changes.
As soon as you Save Changes, you should see other tabs showing up beside Preferences.
Go to Projects tab and click Register a New Project
You can pretty much leave the check boxes the way they are and enter name and some URL for the project
Click Create
This is create a new entry in the Projects tab by the name you entered above
Click on project’s name and then click on Git under Browse Code (or whichever repository you chose)
Now click on the Download tab (Even if it is already selected)
This will take you to a view where you can add new files/folders.
Click on Add Folder and enter a name
Now click on the newly created folder and click on Add File. Browse to the file and click Upload and then click Done.
And there, you have the URL to your project on Source Forge.
Checking in Eclipse project using Team Explorer Everywhere
If you are using Team Foundation System (TFS) as your source control and are working on a brand new project using Eclipse, you may want to keep a couple things in mind to make things go smoothly. Eclipse is the way to go for Java projects. Team Explorer Everywhere Eclipse plugin is what is used to work with TFS when in Eclipse.
1. Do not check-in workspace metadata
In general when you connect to a source control, get latest and try to open a project, you do not expect any files to be checked out; not until you start editing the files. To be able to open the project without checking out anything, do not check-in the workspace .metadata. If you have the entire workspace (with .metadata of workspace) folder checked in, you cannot access the workspace until you manually check-out that whole workspace folder beforehand. This is because every time you open up a project, looks like Eclipse modifies the contents of it to keep track of what you are changing to give you a better experience (like what files are open and what not).
So create a workspace locally and while checking in, just check-in the project with its .metadata folder. That will avoid the .metadata folder of the workspace so you can open the workspace without checking-out anything.
2. Do no check-in automatically generated files
This is more related to Android. Do not check-in the ‘gen’ folder which has the ‘R.java’ file. Otherwise, every time you change something else where, Android plug-in will not be able to modify that file if it is in source control and you start getting errors unless you manually checkout that file. Since it is auto-generated every time, you don’t have to worry about losing it so keep from checking it in. You get the following error if you have it in source control
[2011-09-02 09:36:47 – AndroidApp] ERROR: Unable to open class file C:\Dir1\Dir2\Workspace\AndroidApp\gen\com\android\app\R.java: Permission denied
Export to Microsoft Excel library for Android
If you have tabular data that you want to save in Excel sheet from an Android app, you can use this open source API called JExcelAPI for Android. This API is the modified version of JExcelAPI by Andy Khan to make it work with Android. The only change that I had to make to this library to make it work with Android is to change the character encoding that it uses to write out the Excel file. JExcelAPI uses UnicodeLittle and it is not supported by Android. So I changed it to be UTF_16. The JExcelAPI for Android library is free just like JExcelAPI and is open source and published under GLGPL.
Code formatting plug-ins for Windows Live Writer
I probably should have written this blog along with the Windows Live Writer blog and saved myself a good half hour. My old desktop died and I built a new one couple months ago. So all my settings were lost and I did not remember which one of the many formatting plug-ins I was using as I had spent time to find the one I like the most. Well, I found it back and here is the blog without any delay.
On the Live Writer plug-ins website, there are many options available for formatting code and I probably tried like half a dozen before I found the one that I like. It’s called Insert Code for Windows Live Writer, built by Omar. It is the most popular plug-in in that category but I was not using it with the settings I liked so I could not recall if it is the same one I have been using.
So for the settings for this plug-in, I like to turn off everything. By default, this plug-in has the embed stylesheet option enabled but I like to disable all of them as shown the following options as shown below.
If you enable all options above, it looks good on the Live Writer but when you publish, it looks like shown below.
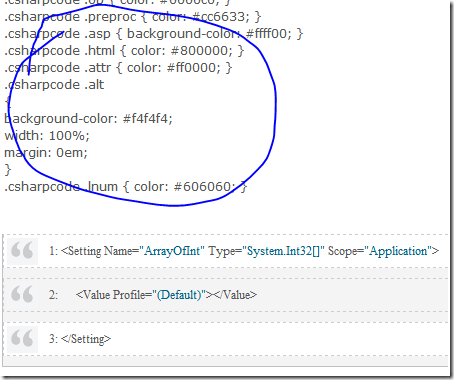
The first option inserts all the CSS highlighted above, second one puts line numbers as it says, and the third one creates the coloring for alternate lines. Now when the line numbers or alternate lines are added, the lines get too far apart and looks pretty bad and not as readable. So, if you disable options, below is what it will look like.
If you have several lines of code, it looks much more readable in the blog.
Adding array types to Settings.settings file (C#)
If you are a .NET developer, you probably have seen the Setttings.settings file in a library project. If you haven’t, it is a file to store your settings in any project. It doesn’t need to be a web application. It has a GUI too to enter values. Perhaps, the most important property of the settings file is that all the values in it are strongly typed.
As opposed to the appSettings in the web project in .NET, the settings file is compiled into the assembly. Which means if you need to add or change a value in it, you need to push the new DLL out to the server. You can always override these settings in your Web.config file if you are not ready yet to do a full release of the application. Later on you can publish the new DLL and wipe out the override that you had on the server.
Adding a settings file
Just like any other file, just right click the project and add a new item in Visual Studio. In the dialog box, choose Settings file. Leave the default name “Settings1.settings” as is. When you open the file, by default if opens up in the GUI interface. It works fine when you are adding the types that are allowed by default by .NET 4.0 – like any of the native types like int or string. To add values of these types, enter the Name, Type, Scope and Value in the GUI interface presented by Visual Studio and save the file. There is a good explanation about user and application scope here on MSDN. Usually I have used it for Application scope in which case the values are read-only.
Adding an array to settings file
Now for the fun part, let’s add an array of integers to the settings file. There might be another, better way of doing this. This is how I have done it. Obviously, the Array type does not even show up in the Type list of the GUI interface. So here is the work around. Find the Settings file on your hard drive. It should be named Settings1.settings if you didn’t change it when you added it. So open up the Settings1.Designer.cs file in your favorite text editor (like Notepad++). Add the following code to this file and save it.
public int[] ArrayOfInt
{
    get
    {
        return ((int[])(this["ArrayOfInt"]));
    }
}
Now open up the Settings1.settings file and add the following code to it in a text editor and save it.
<Setting Name="ArrayOfInt" Type="System.Int32[]" Scope="Application">
    <Value Profile="(Default)"></Value>
</Setting>
Finally, open up the app.config file of your library project and add the following code and save it too.
<setting name="ArrayOfInt" serializeAs="Xml">
    <value>
        <int>1</int>
        <int>2</int>
        <int>3</int>
    </value>
</setting>
As you can see, app.config is where you actually add the values for you Array. After adding the entry, go back to Visual Studio and allow it to reload all files you changed outside of it. Now Build the project.
Reading a setting from the settings file
To read your type safe values in code, just use the following simple code.
public static List<int> GetInts()
{
    return Properties.Settings.Default.ArrayOfInt.ToList();
}
The method shown above returns a generic list of integers by reading our type safe setting value that was compiled into the assembly.
A piece of advice
To reiterate what I said in the beginning, if you want to add or change an existing setting, you need to push the new DLL out to the server. So don’t try to put any of the appSetting values, for example, into the settings file as it will bring unnecessary trouble of releasing the app (or replacing the DLL on server with the new one). The settings file in a library project would be ideal to hold values that are not going to be changed often. Also, if the library project is used in multiple web applications, then those settings will be available in all the web projects providing consistency.
JSON Viewers
Many developers are preferring JSON over XML as it is lighter and hence will be faster especially when lots of data is getting transferred. Besides, JQuery has very good support for JSON which makes it extremely easy to parse it. But at times, you might want to view the JSON is coming back from the web service for debugging and other purposes. There are many options available for formatting JSON into a human-readable format. Several are listed here from websites to desktop applications.
Free
Free software is cool, here are some free options for you.
Browser
These are just websites that you can visit. Copy and paste your JSON in the input boxes it should be formatted for you.
http://json.parser.online.fr/
http://jsonviewer.stack.hu/
http://jsonformatter.curiousconcept.com/
Desktop App
Would like to have something available offline, here is a desktop app that you can download.
http://jsonviewer.codeplex.com/
Firefox Add-on
This is a Firefox browser add-on. There is not input box scenario here. You just install the add-on and when you visit a web service that is returning JSON, then this add-on will format it in a readable format. The formatted JSON is rendered on the main browser window.
https://addons.mozilla.org/en-US/firefox/addon/jsonview/
Notepad++ Plugin
Prefer an offline plugin that you can use to view JSON in a tree format? There is a Notepad++ plugin for that too. Not only does it show the JSON in a tree format in a separate frame, it also formats JSON in a readable format in the main Notepad++ window. Install the plugin by just dropping the DLL in the right place. To format a JSON string, paste it into Notepad++ and select it. Then go to Plugins –> JSON Viewer –> Format JSON and it should instantly format it for you.
http://sourceforge.net/projects/nppjsonviewer/
Paid
If none of the above satisfy your needs (which I highly doubt), you can see if this paid version has what you are looking for.
http://www.jsonpro.com/
Auto-generating unit tests in Visual Studio 2010
Visual Studio has many productivity tools available and unit test generation is one of my favorites.
This blog will talk about creating unit tests for newly added business logic code files. Each file will have its own unit test file. The generated code will write a separate unit test for each property in the business class.
Right-click on unit test project and create a new folder if you have related files in a separate namespace.
- Right-click on the unit test project or the folder to add the unit test file to and select Add –> Unit Test… menu item.
- Opens up a dialog box which shows the dll for which this UT project is setup in an expandable format, find and select the file that you want to generate unit tests for. You can also select multiple files and even specific properties or methods in a class to generate unit test for.
- VS will generate UT files with the name [ClassName]Test.cs by default. But you can change that by clicking on Settings… button at the bottom left of the popup. It allows you to change settings for file name, class name and methods that will be generated. I don’t see a reason why you would do that. For consistency’s sake, it’s better left alone.
- After selecting the files and settings changes, if any, click OK and the new files are generated with lots of code in it that will greatly reduce the amount of code you will write to test your business logic. Besides, if you use this tool for all your new classes, all your UTs are structured the same way and makes it easier to read thru code as it goes by the same standard for all tests generated by this tool.
- Among code that is generated, there are comment lines like // TODO: Initialize to an appropriate value. Get rid of them as you are filling in code for testing.
- Replace the
Assert.Inconclusive("TODO: Implement code to verify target");with your Assert.AreEqual or Assert.AreNotEqual and so on. Assert.Inconclusive will always throw AssertInconclusiveException causing the UT to fail. You will have to remove those lines before you check-in your code to avoid breaking build on the server.
One of the minor things I’m not too crazy about is the way the tool declares and initializes actual variable.
DateTime actual;
actual = target.CreatedTime;
It’s not a big deal but I usually fix it to be in a single line as it is more readable.
DateTime actual = target.CreatedTime;
Have fun writing unit tests.
Development with Dropbox
Dropbox is one of the coolest programs I have ever used.
Works well when you have many files in different projects that you change and instantly starts syncing as you save
While working with Eclipse, the project file stores details such as files that you had open last time you were working on the project, your theme, font, font size and everything else in the Perspective that you were working in. Basically when you open the workspace on another computer, you get the exact same view of your IDE. If you don’t like some setting and you change it on this computer, go back to your first computer and its there. That is awesome! Another very cool thing is that each time you save a file, Dropbox instantly syncs it to its servers. So, probably by the time you build your new changes, you have your new code saved on reliable servers.
There are also iPhone and Android apps for Dropbox and are pretty cool. You can easily access files that were synced to Dropbox servers.
Now with Dropbox , you get some 2GB of free storage. If you download it from someone’s “sharing link”, then you get 250MB extra over 2GB and the person who is sharing also get 250MB of extra free space.
But, if your project grows to be anything substantial, you would want to have a source control so you can have history, which you don’t get in Dropbox. There are several free options available, like Assembla.
Assembla – Free, private, hosted, version control system
Do you develop software at home and sometimes may be work on relatively bigger projects? If yes, then you should be using a version control system. Many people develop at their free time and do not use version control. I would strongly suggest you should, especially since it’s FREE.
Let’s look at the title first.
Free – Well, it’s free.
Private – Means it is only accessible to you. No one else can see your code. This is important if you are no writing open source software. Note that Private is an option, you can also have a Public repository too.
Hosted – There are different kinds of version control systems. Some require it to be hosted somewhere (you can host it if you can afford a server). For example, Subversion requires that it be hosted on a server.
Version Control System – A program that lets you keep history of changes to your code. This is very crucial when you are working with a team to keep track to changes made to code. But it is also has benefits if you are writing code for yourself.
Assembla is a hosted version control system for Subversion, GIT and Mercurial also. You get upto 1GB of free storage. That is a lot of code you can store. Below are steps you can follow to get started with Assembla.
Step 1: Login
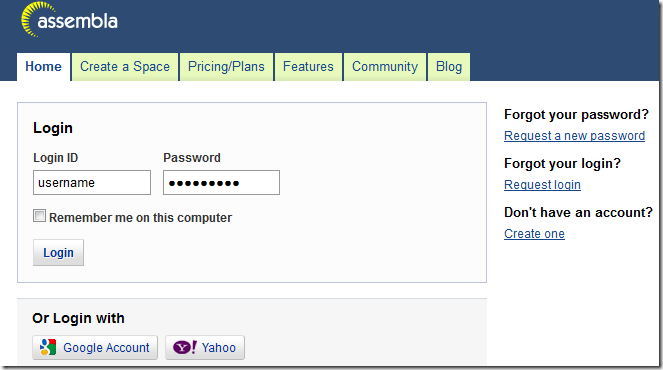
At the time of this writing, you can login to Assembla with your Google or Yahoo! account. One caveat though was that when I tried to connect to my repository with Eclipse, it would not work as Eclipse does not support logging in with your Google or Yahoo! account. Hence, you are better off creating an Assembla account in my experience.
Step 2: Create space
Click on the “Create your own space” button to create a space where you can add projects.
Next, click on the “free plans” link to expand the panel as shown in the image below. Select Subversion, Git or Mercurial depending upon which one you want to you. Say you want to use Subversion, click on that.
On the next page, give the space a name, a unique URL (it can be Android if you want to add Android projects to it). You can also add a description or tags to this space.
Make sure to select Allow: None under Non-member access if you want your repository to be private. Leave the Member access setting to Edit.
Click on “Create the space” button to create it.
Step 3: Connect to your space
When you click “Create the space” button, it redirects to a new page which shows your newly created space. Go to the Source/SVN tab on that page. It should show “svn URL”. That URL is what you will use in Eclipse to connect to your space and check-in code.


